I used 3dmax 2009 and Vray SP2 in this tutorial.
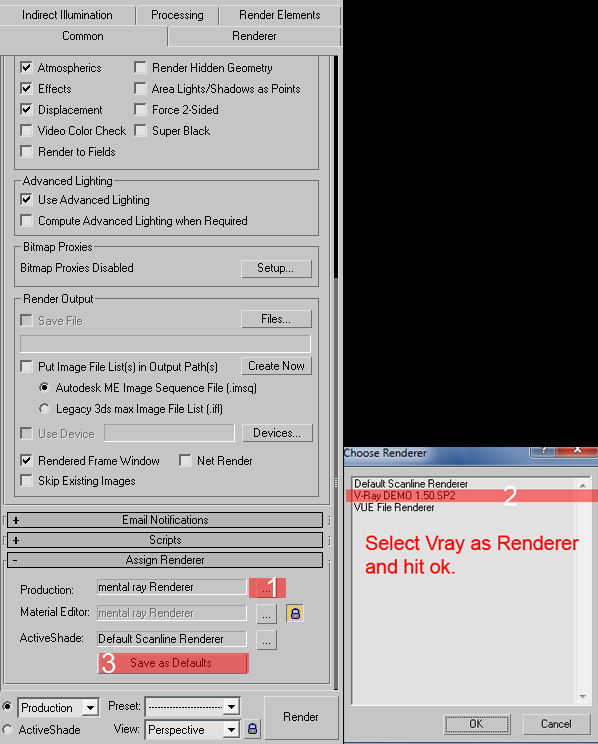
PART I. Assigning vray as the default renderer
Step I. On you 3ds max window, hit F10 to open up the render set up.
Step II. On the common tab, go to Assign Renderer.
PART II. Setting Up the Render Settings
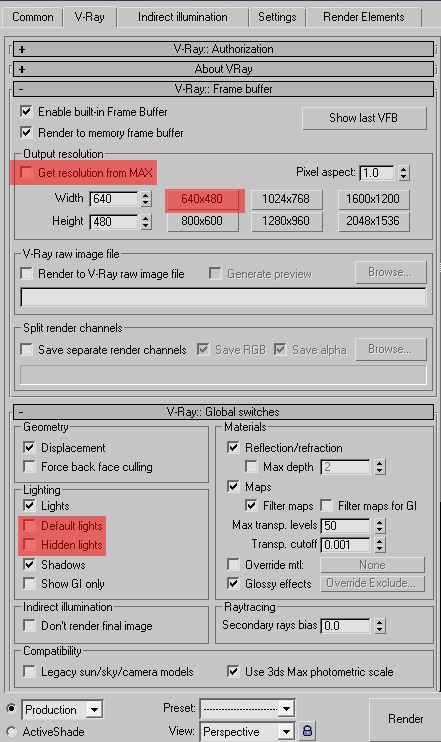
Notice the Highlighted part of the image. These are the values that are needed to be set.Under the vray Tab:
Set the V-Ray: Frame buffer and V-ray:Global Switches
1.Uncheck Get resolution from max
2. Choose the image resolution. Higher Reolution means longer render time
3. Under Global Switches, uncheck Default Lights and Hidden Lights
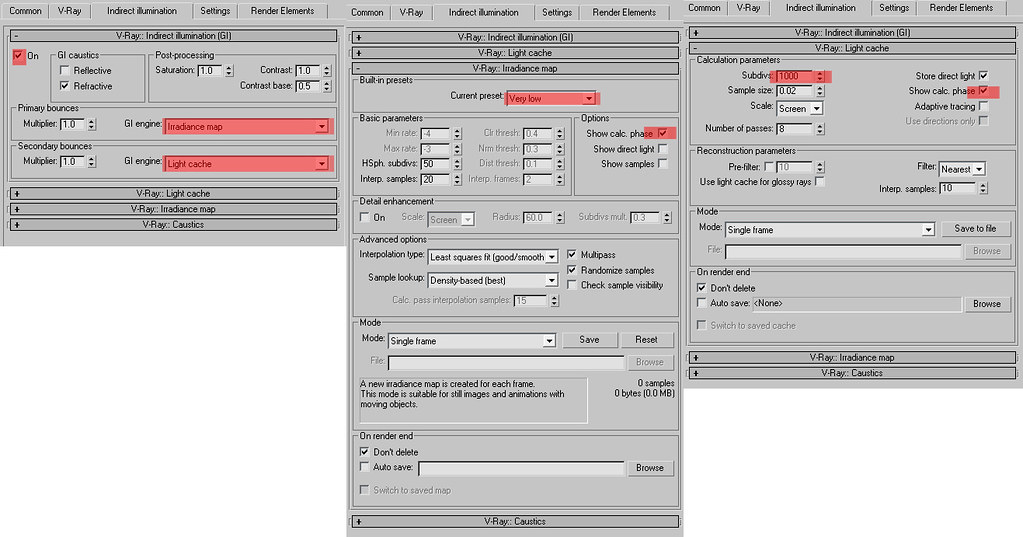
Under the Indirect Illumination Tab
Set up V-Ray: Image Sampler, V-Ray Environment, and Vray Color Mapping
IMPORTANT! V-Ray:Indirect Illumination should be turn on. Select Irradiance Map as the primary bounce and Light Cache as the secondary bounce
Under Settings Tab
Change the value of the noise threshold to 0.005. This will reduce the noise in your rendering.
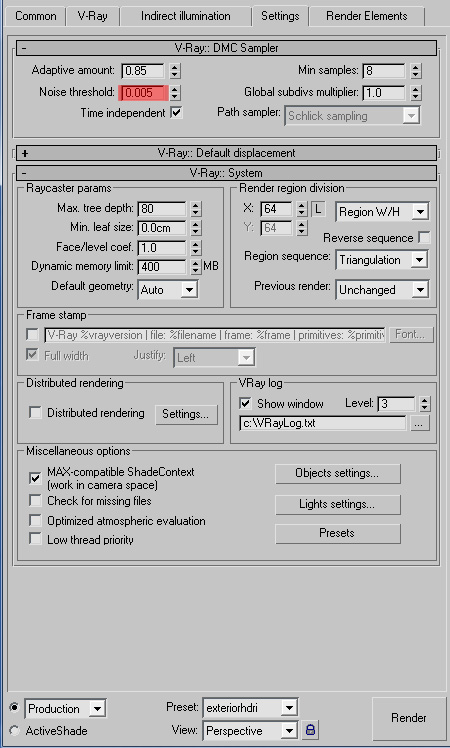
Save your render preset.
Take note that this setup produces a low quality render. It could be used as a draft setting. You could increase the quality of the rendition by increasing your image resolution under V-ray framebuffer tab. But it would take a longer render time.
Light Cache and Irradiance map also affect the rendering time. The higher the subdivs of your light cache the longer time it will take. I suggest 50-100 for draft and 1000-2000 for high quality rendering. There are also built-in presets under the irradiance map tab. I suggest that you use Very Low for draft and Medium for high quality rendering.
Your render settings will greatly affect the render time. So i suggest that you create a test render or draft preset and a high quality preset.
You could start rendering an exterior scene using this setup.This scene below is rendered using this render setup. No camera and lights are present in the scene. Notice that there are no shadows present in the scene. Creating lights and shadows will be tackled in the next part of this tutorial.
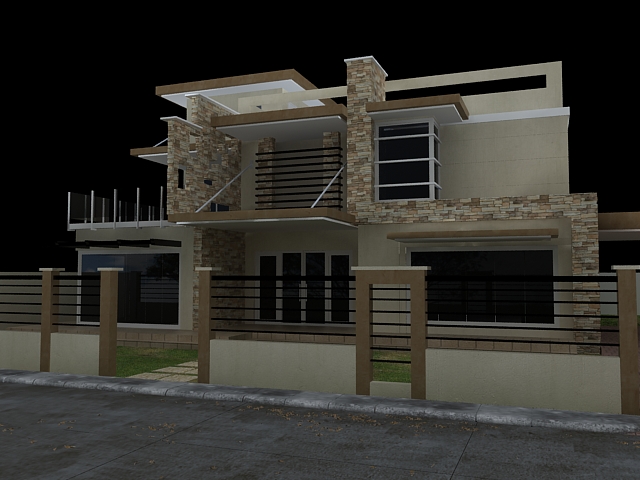
Note that your output may vary greatly, depending on the materials and textures you have applied to your model.
Part III. Creating Lights and Shadows
Shadows will only be present if there are light in the scene. There are 3 types of lights that we could use.
1. VrayLight
2. VraySun
3. VrayIES
We could also use standard lights ,but i suggest to use those three mentioned above.
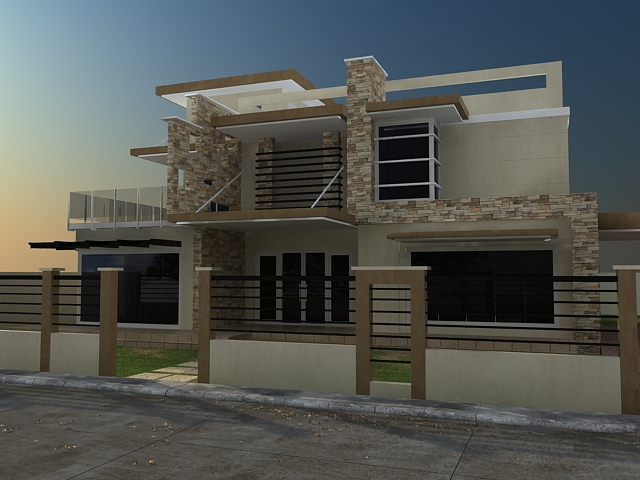
UsingVraySun
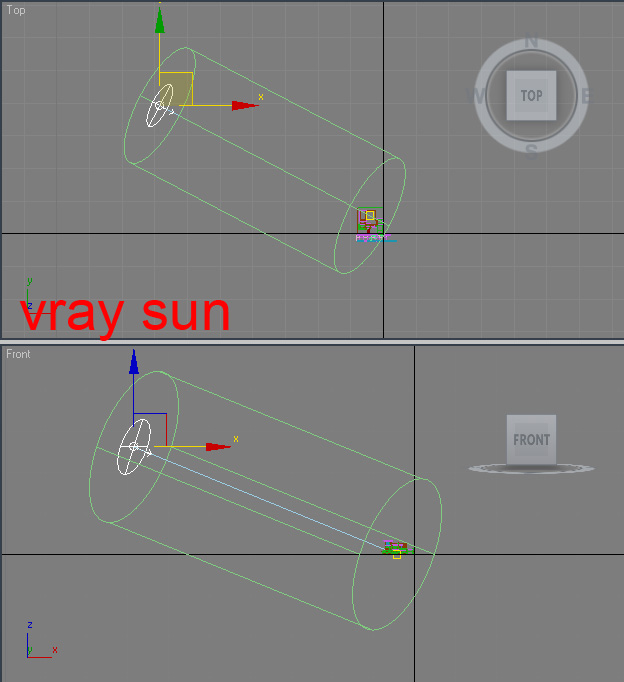
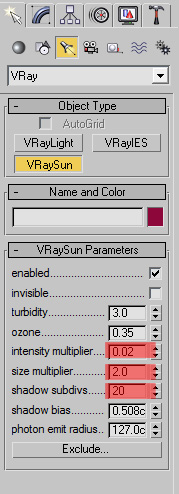
These scene is rendered using vraySUN and vraySKY combo. After applying vraySun in your scene, a pop-up window will ask if you want to enable vraysky. Just choose yes. The color of the sky will vary depending on your vraySun's position.
These render set-up is based on my own. It's purpose is to give beginners an idea on how basic lighting is made. You can always experiment on the render settings and change some of its values and see the differences.
~mcgoogles2010©


Post a Comment